The following FAQ shows you how to add multiple Members at once via the Portal, using our Bulk Import Tool.
* If you wish to add your Members one by one, please see this FAQ.
* Please note that adding Members to your list makes them to eligible to create an account, but does not send them an email to invite them or create an account for them. You will need to follow these instructions if you'd like a Bulk Email Invite to be sent.
---
You can upload multiple members at once using our Bulk Import tool.
Step-by-step instructions below or watch this video
Log In
Go to: https://admin.myclearhead.com/login
Note: If you don’t see the ‘Members’ tab, try logging out and back in.
Steps to Bulk Import Members
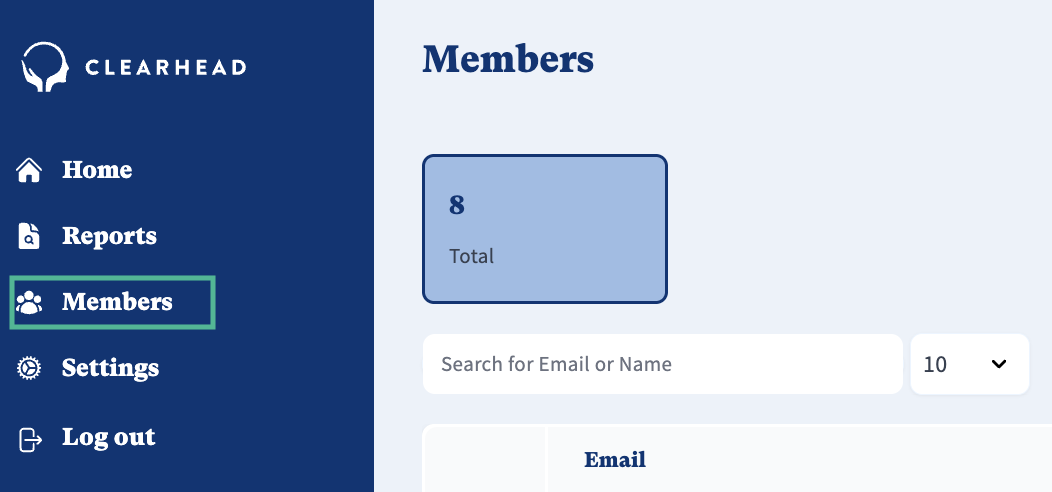
1. Go to the ‘Members’ tab.
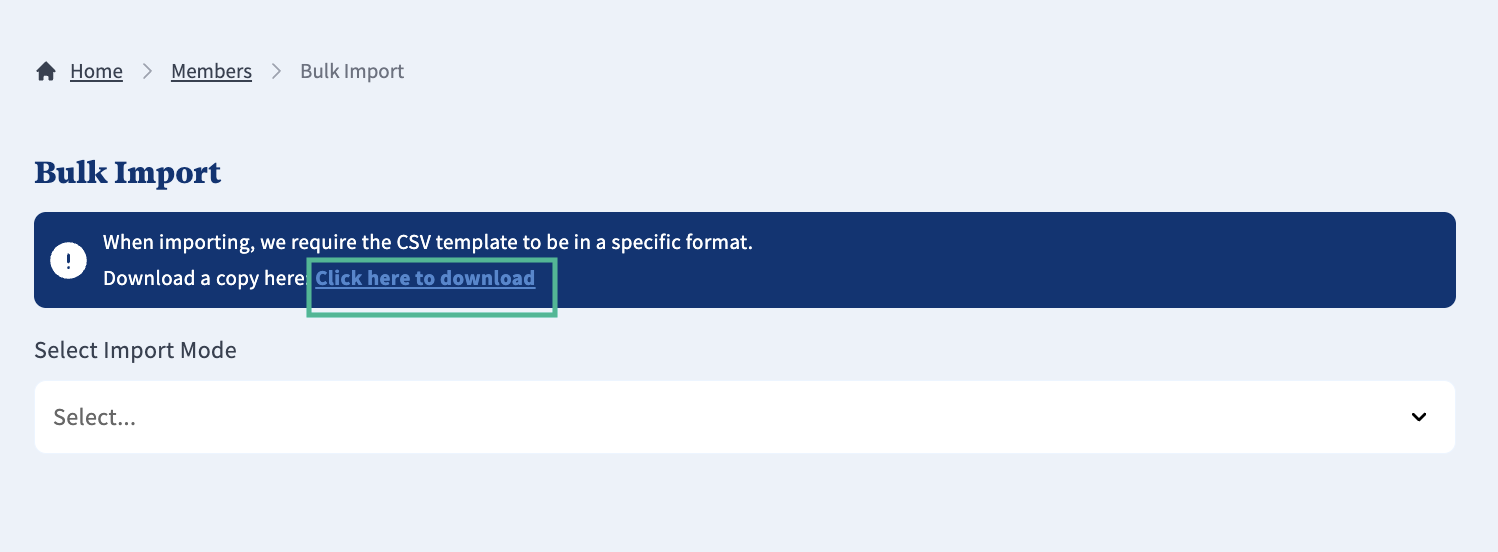
2. Click ‘Bulk Import’.

3. Download the CSV Template (linked in the portal).
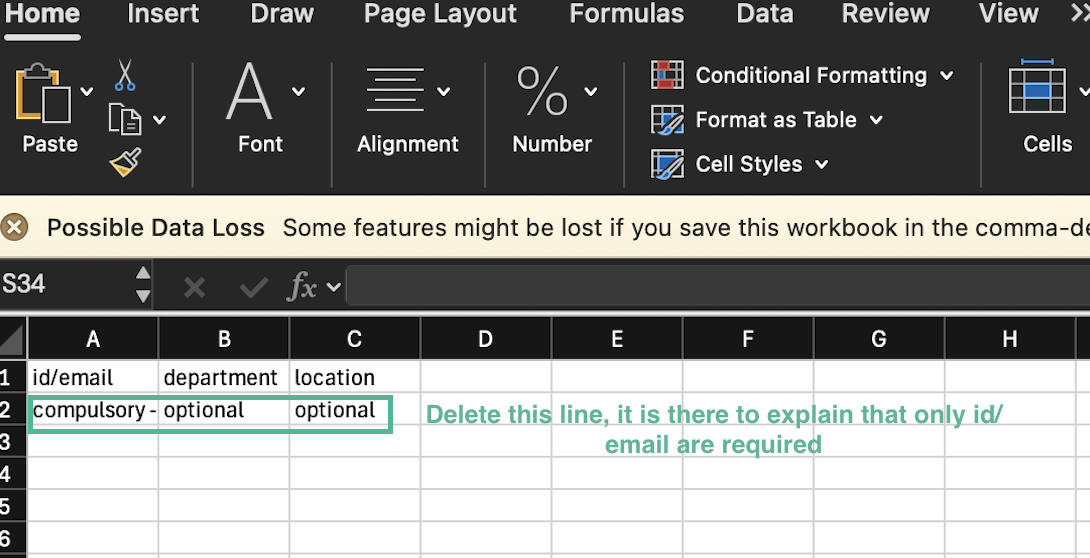
4. Fill out the CSV with your eligible members.
5. Choose the import option that suits your need (e.g. ‘Full’ or ‘Partial’).
6. Upload your file by dragging and dropping it or selecting from your computer.
If you wish to automatically apply changes to your list, tick 'Automatically apply changes after processing'.
If you don't tick the box, you will need review and approve your upload before it is live.
We recommend this approach so you can check your import has successfully added, removed or updated members correctly before we process the updated list. (See Step 9 for an example).

7. Review the import summary before continuing.
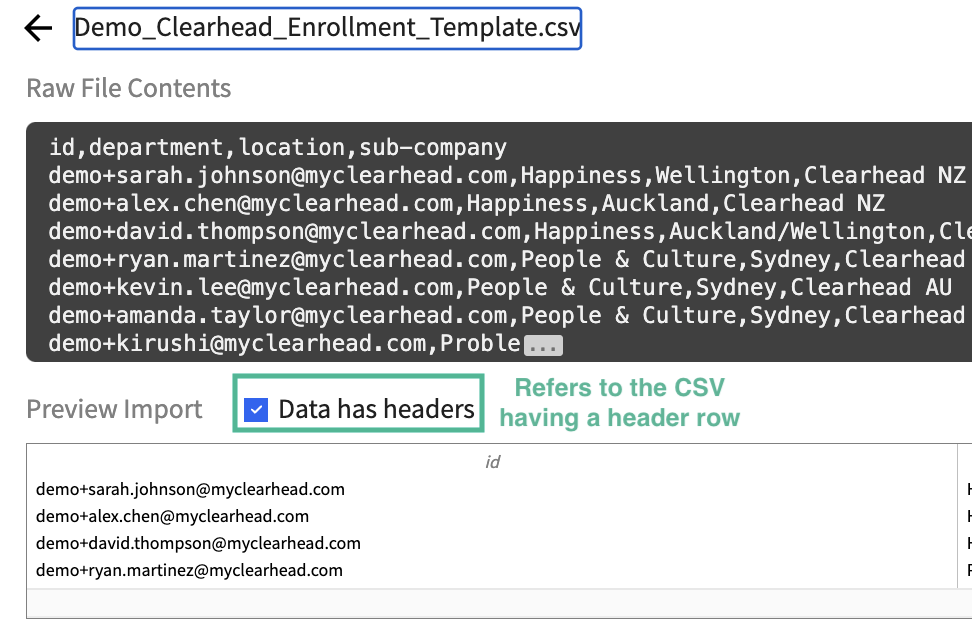
8. Confirm column mapping, then click ‘Import’.
9. If you did not tick 'Automatically apply changes after processing' then you will be prompted to check any changes between your last and new import. When you are happy with the changes, please click 'Approve & Apply Changes' and the import will be completed.
For example, in this example import we have updated one record and eight are unchanged.

You can view your previous uploads by clicking 'View'.
Troubleshooting
To avoid errors:
Only one header row (no extra rows or text).
Remove duplicates and blank lines.
Use Excel’s “Highlight Duplicates” or “Go To Special > Blanks” tools.
Save as UTF-8 CSV
Go to File > Save As > CSV UTF-8 (Comma delimited).
Was this article helpful?
That’s Great!
Thank you for your feedback
Sorry! We couldn't be helpful
Thank you for your feedback
Feedback sent
We appreciate your effort and will try to fix the article